Streamline Your GitHub Workflow with Reusable READMEs
Table of Contents
Description
This guide will show you how to create a reusable README template for your GitHub projects, saving you time and ensuring consistency across repositories.
Motivation
Every project on GitHub should have a comprehensive README file. Instead of creating a README from scratch every time you start a new repository, use an existing template to automate and standardize the process. This ensures consistency across projects, helps you follow best practices, and speeds up your setup.
Installation
Create a sample README template by following these steps:
- Create a New Repository: Go to GitHub and create a new repository.
- Set Up Your Template: Add the files, directories, and configurations you want to include in your template. Be sure to include essential sections like
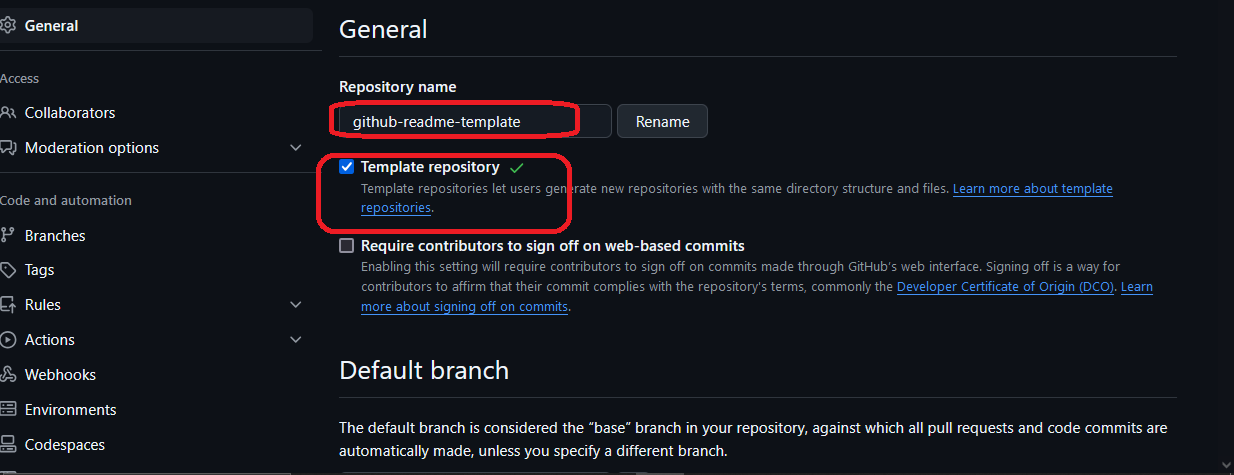
License,Contributing, andUsagein your README template. - Mark as Template: In the repository settings, check the box labeled "Template repository" as shown below:
Usage
Once you have your README template set up, follow these steps to use it:
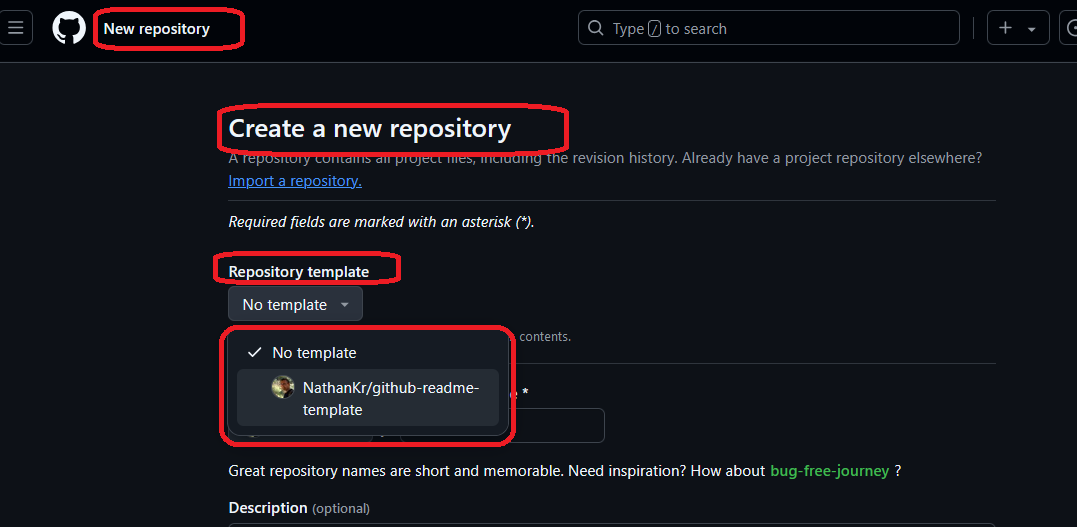
- Use the Template: When creating a new repository, select your template from the "Repository template" section. This option is available after you have created and marked your template project.
- Customize as Needed: After creating the repository, modify the template as necessary for the specific project. You can add project-specific details or remove irrelevant sections.
Points of Interest
Check out github-readme-template (tag 0.11). This README template includes the following sections:
- Project Name
- Project Description
- Motivation
- Installation
- Usage
- Design
- Technologies Used
- Code Structure
- Demo
- Points of Interest
- References
- Authors
- Contributing
- License
Conclusion
By creating a reusable README template, you can significantly streamline your GitHub workflow and ensure consistency across your projects. Follow the steps outlined in this guide to get started.